Recent Comments
Recent Posts
Archives
Categories
https://onedrive.live.com/embed?cid=290CB921F233A7CB&resid=290CB921F233A7CB%21781&authkey=AF8pVIMBleToklg&em=2
Cleaning air conditioners in the spring

Spring is just around the corner (especially with all these spring-like temperatures we’ve been having in early January)! Prep your house’s air conditioning units for maximal efficiency before you need to start using it with these easy steps via FamilyHandyman.com.
Few routine chores will pay off more handsomely, both in comfort and in dollars saved, than a simple air-conditioner cleaning. The payoff: Summertime comfort and lower cooling bills. You’ll also prolong the life of your air conditioner.
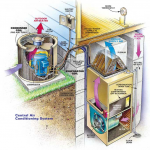
In this article, we’ll show you how to clean and maintain your central air conditioner to keep it running efficiently. We won’t demonstrate the maintenance steps for a window-mounted model here. Most central air conditioners have two basic parts: an outdoor unit (compressor/condenser) that sits next to your home and an indoor unit (evaporator) that’s located in a central duct near your furnace (Fig. A). If you have a heat pump instead of a furnace, the indoor unit will be in the air handler. Use the same maintenance steps we show here. If your furnace looks different from the one in Fig. A, or you have a heat pump, use the owner’s manual to find your way around it. The basic parts will be the same.
The most important maintenance steps are fairly simple, but if this is the first time you’ve cleaned the unit, allow about a half day to carefully work through the steps. If you’re not up to the task, call a pro (look under “Air Conditioning Contractors” in your Yellow Pages). Cleaning and servicing a central air conditioner costs $100 to $250.
Fig. A shows a typical central air conditioning/furnace setup. Two copper tubes connect the outdoor compressor and its condenser coil (a “coil” is a combination of fins and tubes) to the indoor evaporator coil that’s located in the plenum (Fig. A) above the furnace blower. One tube is covered with foam insulation. If you have a heat pump, both tubes will be insulated.
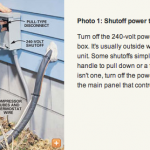
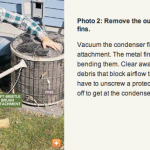
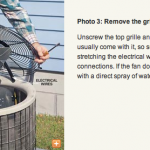
Outside, your main job is to clean the condenser coil (Photos 2 – 4). The fan inside the condenser coil sucks air through the fins, and as a result, pulls dirt and debris with it. Dust, leaves, dead grass and anything else that collects on the fins will block airflow and reduce the unit’s efficiency. Grass clippings thrown by the lawn mower and “cotton” from cottonwood trees and dandelions are particularly bad offenders. You might have to clear the fins weekly or even daily during the spring “cotton” season! Always begin by shutting off the electrical power (Photo 1).
Then proceed with the cleaning (Photos 2 – 4). If the fan motor (Photo 3) has lubrication ports, apply five drops of special oil for electric motors (not penetrating or all-purpose oil). You can find oil for electric motors at hardware stores. Many fan motors are maintenance-free—they don’t have oil ports (ours doesn’t) and can’t be lubricated. Check your owner’s manual if unsure.
The compressor and its motor sit inside the coil (Fig. A). They’re usually sealed and won’t need maintenance. However, if you have an older compressor that’s belt-driven by a separate motor, lubricate the motor through its oil ports. In every case, keep an eye out for dark drip marks on the bottom of the compressor case or pad (Photo 5). This indicates an oil leak; the compressor or tubes might be leaking coolant (refrigerant) as well. If you find a leak, call in a pro to check the problem. Don’t tighten joints to try to stop leaks yourself! Over-tightening can make the problem worse. And only a pro with proper equipment can recharge the system to the proper level of coolant.
Read more at FamilyHandyman.com


